


Gardening with kids comes with many benefits – connecting with the land and their food, connecting with each other in a fun way, academic learning, and the end result – eating the food they have planted, cared for, and harvested. But how do you even know if your seeds will sprout? A fun way to see is by grabbing any seeds you have on hand and checking to see how viable they are.
Your kids can help or take lead on this science experiment, depending on their age and interest. Our crew, aged 4, 7, and 11 at the time, participated to varying degrees. A favourite part, other than the vibrant red in the beet sprouts, was the wash of cucumber scent that was released as we checked on the cucumber seeds. It was seriously intense, and like a little burst of summer!

Depending on how many seeds you have, this activity will take an hour or so to start. Just download the free printable photo tutorial and chart over at Tiny Peasant to get started.

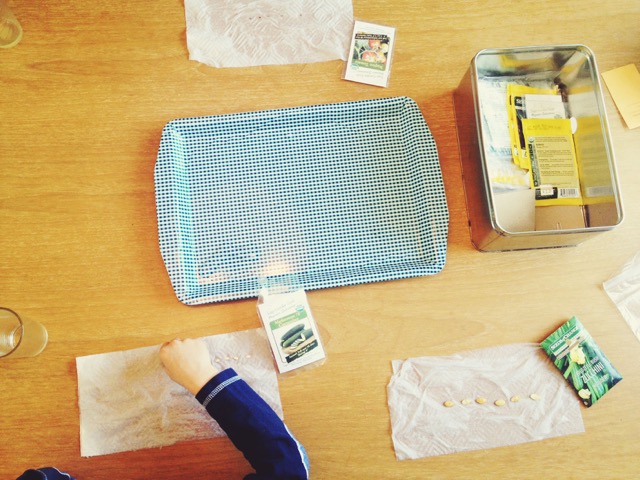
Materials for your seed germination experiment
- seeds
- sharpies
- ziploc bags
- paper towels
- a tray
- water
Instructions
- Fold a paper towel in half and dip it in the water, just leaving it in long enough to get a couple of wet patches, as the water will soak into the rest of the towel in a few seconds.
- Place ten seeds of one variety (or five if you don’t have many left) along the paper towel. The key is to make it consistent as you’ll be doing math based on the number you test later on.
© Kris Antonius - Fold the paper towel over, and then again, place it in the bag, and label with the seed name using a sharpie.
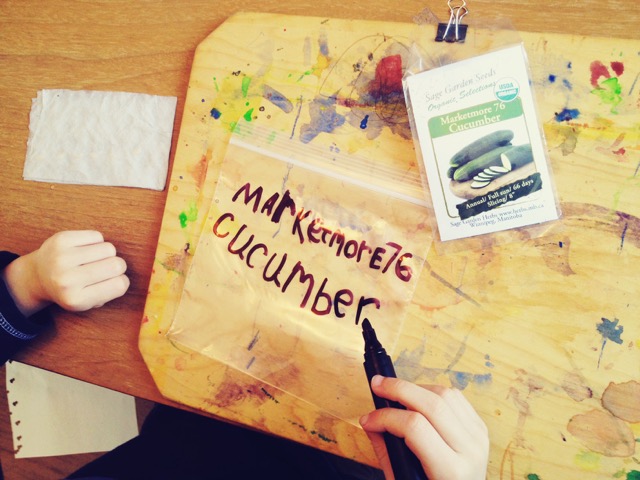

© Kris Antonius - Repeat steps 1 to 4 for each seed. If you want to save bags, you can label a popsicle stick or other garden label and place it in the paper towel, allowing you to place multiple seed sets in each bag.
- Set the finished test seeds in a warm, dark location for three days.
- After three days, open up the paper towels and record your results using the printable chart or something you whip up. To add some math fun to our project, we recorded the number of seeds that had germinated out of ten, and then translated that into percentages. This helped us determine which seeds were viable enough to plant.


© Kris Antonius - If you have a number of seeds that don’t germinate, you can put them back for another few days and check them again to see if they just needed a bit more time, of if they have called it quits. If there are one or more mouldy seeds, remove them, and put the remaining seeds on a new dampened paper towel.
Any seeds that you find are not viable for planting can be kept for art projects!
If you’ve already made your garden plan, and it includes some of the seeds that weren’t viable, make a note to pick up some new seeds to replace them, or rearrange your plan to omit those varieties. Have a great time digging into plant science with your kiddos!
*Originally published March 16, 2016


